Building my wife an Embassy from scratch
EDIT: THIS GUIDE CURRENTLY WILL NOT WORK. WE ARE CURRENTLY ALL HANDS ON DECK WITH 0.3.0 UPGRADE AND I DO NOT HAVE TIME TO UPDATE THIS GUIDE. THERE ARE ONLY A COUPLE OF THINGS THAT NEED TO BE CHANGED BUT IF YOU DON’T KNOW HOW TO FIGURE THOSE OUT, PLEASE DON’T ATTEMPT THIS!
Recently I became aware of the projects to make digital self sovereignty more available to the more nooby freedom lovers out there by making these simple, plug ‘n play devices. Bitcoin takes you down a path where becoming self sovereign with your money feels like such a game changer that you want to migrate this into other areas. Running a bitcoin node isn’t enough! We want to host our own chat, file server, mastodon (social network) instance etc!
When I got mine up and running I went from mildly curious to absolutely blown away within seconds. I had decided to build mine manually using the source code and a few guides offered by Start9labs. This was far from easy, but it worked in the end. I’d really like to extend my gratitude to Matt Hill, Keegs, Aiden, and Mariusz for helping me get through it.
I decided to write this guide for anyone else that wants what I have, but that doesn’t want to buy a device directly from Start9.
I *do* encourage you to donate to them. They are doing absolutely fantastic work.
My principles wouldn’t allow me to purchase one myself, I had to get the thing up and running from source manually. It’s not because I’m tight (I am) it’s firstly because “free — as in freedom” (as RMS would say), opsec (not having to reveal my address to anybody), I don’t want to feel like I’m making a cop-out, and lastly I want to do less trusting, and more verifying. Indeed those are the only motives I’m aware of. Money certainly isn’t one as I barely saved anything after buying all the components, then when I take my time into account it would certainly be cheaper to just buy one.
Putting it together yourself is a fantastic feeling and I encourage you to do it, just not to the detriment of those rolling out the software. Support them if you are able.
Anyway, I started by ordering the 8GB Raspberry Pi, official power supply, heat sinks, fan and a case. I also have a speaker left over from my setup that is pretty much essential for telling you what the Embassy is doing during setup and updates.
The main bits arrived this morning and I finally have some time to dig into this all again.
Equipment list:
- Raspberry Pi4 (I got the 8GB model)
- Good power supply
- Case
- Fan (One that doesn’t use speaker pins, Canakit Fan was perfect.)
- Two SD cards. First at least 32GB and second ideally 128GB or more
- GPIO Speaker
- Ethernet cable
- SD card USB reader for your laptop/PC if it doesn’t have an SD card slot.
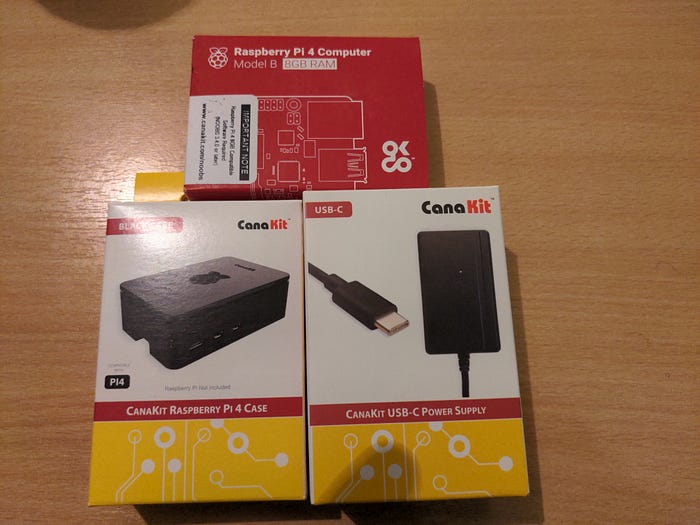
This should make an absolute beast of a personal server for her. Decent power supply (I’ve heard bad things about not using good enough ones) and a case that will allow space for a fan. I am using Canakit’s fan rather than the official Raspberry Pi fan. This is good because it doesn’t need the same GPIO pins as the speaker does. More on that later.
The guide that I’ll be using for this can be found here but shouldn’t be necessary for anyone following this article:
I believe that the above guide may be updated and moved to a more prominent location within Start9labs’ github soon.
I’ll be using OS X on a macbook pro and doing almost everything through SSH in my mac terminal.
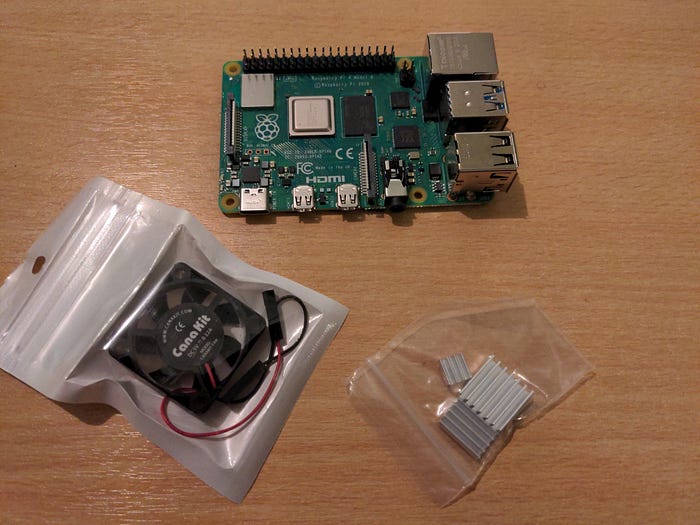
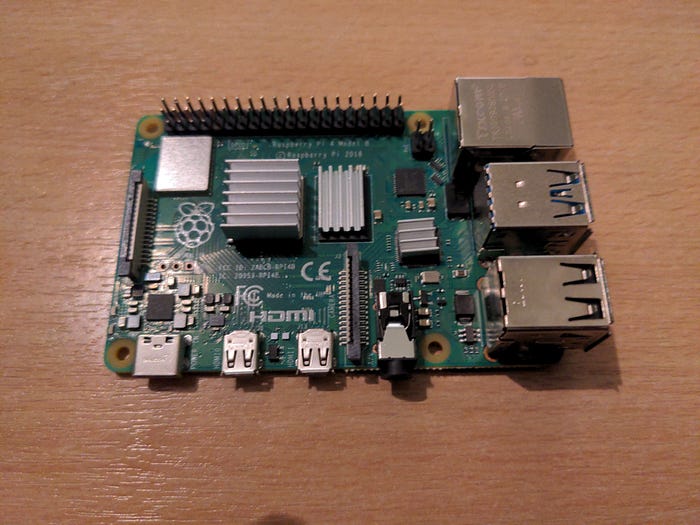
I bought a 128GB SD card for this, but that’s for the final image to be flashed onto.
I will be compiling EmbassyOS using the32GB SD card that I have lying around though as I don’t want to try the image I build while having to wipe all my hard work along the way in case it doesn’t work. Therefore keeping all building software on the first SD card and trying out the image on the large SD card will save me a lot of potential aggravation.
Now to set up the Raspberry Pi. I’ll be using Raspbian Lite:
And I’ll use Balena Etcher to flash it onto the 32GB SD card.
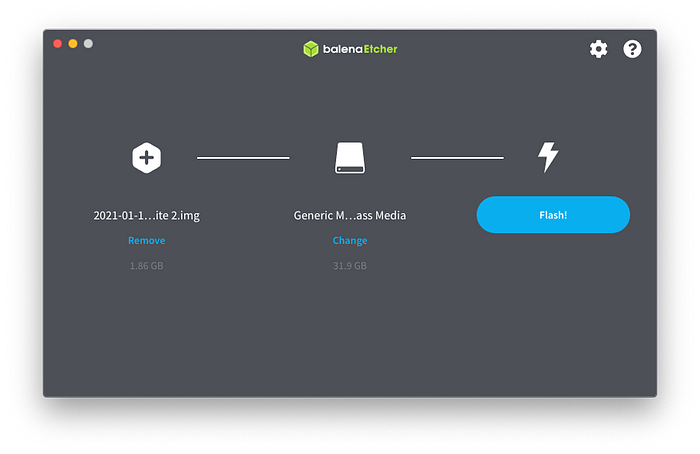
Done — flashing successful. I find it always fails a couple of times. I had to rename the Raspbian image to get it to work. You can always flash the OS using CLI if it refuses to work. Plenty of guides for that out there such as this one:
So now we have Raspbian OS flashed onto an SD card — awesome. Let’s modify it so that we can SSH into it straight away. If you don’t have an Ethernet cable you can make it autoconnect to wifi too, but seeing as we will require an Ethernet cable to use EmbassyOS the first time anyway I’m not going to get into that here. Just plug up the Ethernet cable.
So to enable SSH without having to plug in a screen/keyboard etc we need to add a file to the SD card.
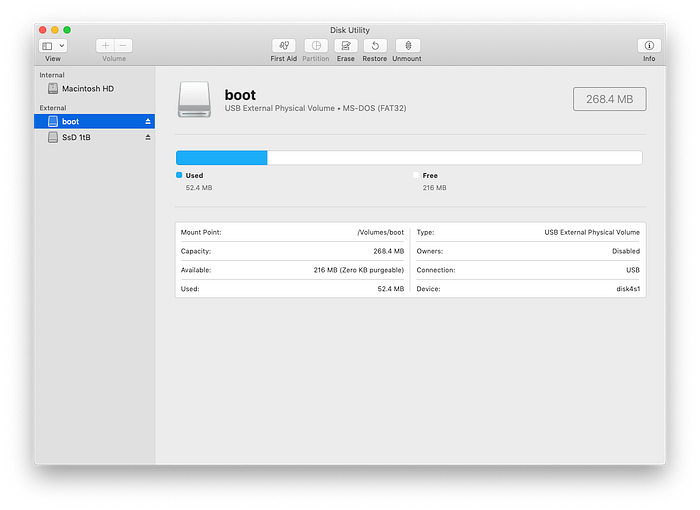
First we’ll need to mount it. There’s probably a way to do this within terminal but I can’t find one that doesn’t require installing stuff. So I simply open up Disk Utility (Appications -> Utilities -> Disk Utility), find “boot”, select it, and click “mount”
Now we open up terminal, navigate to the SD card and create ssh.txt:
cd /Volumes
cd boot
touch ssh.txt
ls -a | grep ssh
#Do you see the file we just created?
#If so:
cd ~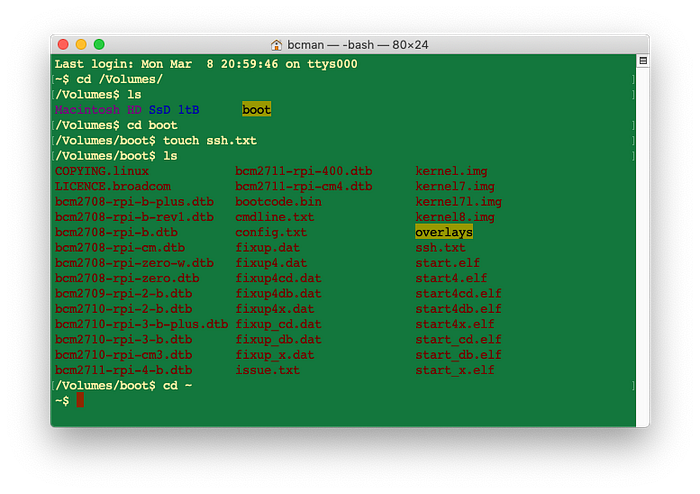
Now head back to Disk Utility and eject “boot”.
Time to plug up the Pi!
First stick the SD card into it.
Lets plug the fan in too as we’re compiling a tonne of software. Red wire goes to pin 4, and black wire goes to pin 9 (or another ground, but *not* pin 6 as the speaker will need that one). Now you can put it in its case.
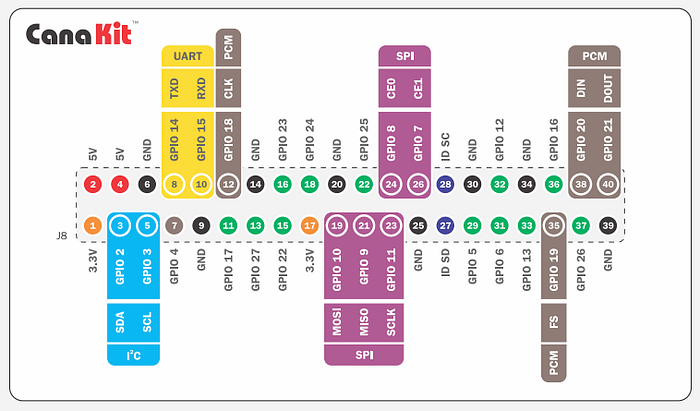
Do the heat sinks now if you haven’t already.

Then, plug in the Ethernet cable, and finally the power.
If all has gone smoothly, we should be able to SSH in soon after it has booted for the first time. Give it a couple of minutes.
For this I go into my router and look for “raspberry pi” and learn its IP address. In my case it’s 10.0.0.16 — that means to SSH in you open terminal and type:
ssh pi@10.0.0.16(You can download something like AngryIP scanner if you don’t know how to get into your router.)
You’ll be asked the password. It will be “raspberry”. You can change this if you like by typing “sudo raspi-config” and following the instructions there. I am not going to bother changing mine here.
If all has gone well, we should be SSH’d into our Pi and can start with the fun stuff.
Firstly, we’ll run:
sudo apt update
sudo apt upgrade
Then hit “y” when it asks for confirmation.
Next install GHC (takes a couple of minutes):
sudo apt install ghcTest:
ghc --versionWe want:
The Glorious Glasgow Haskell Compilation System, version 8.4.4Next — stack!
At time of writing the stack we need isn’t available for the device we’re using so we have to download and install an older one and upgrade to the newer one from the Pi itself:
cd ~/
wget -qO- https://raw.githubusercontent.com/commercialhaskell/stack/v2.1.3/etc/scripts/get-stack.sh | sh#now lets see if that worked:
stack --version

#get something like this?
Version 2.1.3, Git revision 636e3a759d51127df2b62f90772def126cdf6d1f (7735 commits) arm hpack-0.31.2
Ok, now to upgrade it.
git clone --depth 1 --branch v2.5.1 https://github.com/commercialhaskell/stack.git
cd stack
And now I remember — the next step will take almost 4 hours — probably longer for me as I’m using an SD card. That means my SSH will timeout and possibly screw this up for me. Let’s disable that from happening:
sudo nano /etc/ssh/sshd_config#paste at the bottom:
TCPKeepAlive no
ClientAliveInterval 30
ClientAliveCountMax 240
#then hit Ctrl+X and then hit Y and Enter to save
Now SSH won’t time us out. We can start compiling Stack v2.5.1!
Check that you’re still in ~/stack, and then:
cd ~/stack
stack build --stack-yaml=stack-ghc-84.yaml --system-ghc
It’s late and I’m heading to bed. Hope this compiles OK or tomorrow morning is off to a bad start.
…And….A good morning it is!
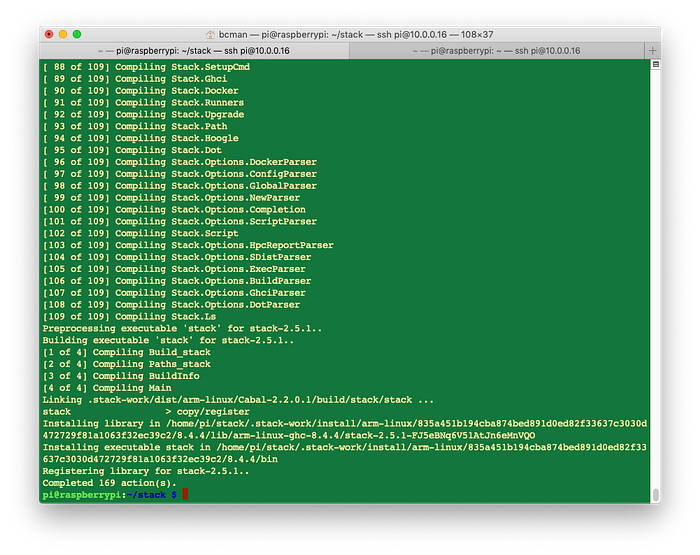
SSH didn’t timeout, and stack 2.5.1 compiled perfectly. Now to install it.
stack install --stack-yaml=stack-ghc-84.yaml --system-ghc#It installed just fine with the following message:
#Warning: Installation path /home/pi/.local/bin not found on the #PATH environment variable.
#So we'll add that to our .bashrccd ~
nano .bash.rc
#Add the following:
export PATH=~/.local/bin:$PATH
#Hit Ctrl+x, then y and return to save.echo $PATH
#/usr/local/sbin:/usr/local/bin:/usr/sbin:/usr/bin:/sbin:/bin:/usr/local/games:/usr/games
source .bash.rc
echo $PATH
#/home/pi/.local/bin:/usr/local/sbin:/usr/local/bin:/usr/sbin:/usr/bin:/sbin:/bin:/usr/local/games:/usr/games#The above checks if we modified our .bash.rc correctly and added ./local/bin to our $PATH.
Onwards.
Now we get to clone EmbassyOS from github and run the make agent.
First we install llvm and libgmp
sudo apt install llvm-9 libgmp-devIf that worked, time to git clone.
cd ~/
git clone https://github.com/Start9Labs/embassy-os.git
cd embassy-os/
Now the guide that I am following says the following: “#Note: This will install ghc-8.10.2, then attempt to build but will give errors (in next steps we deal with errors).
I didn’t get any errors last time, but a few things have looked different this time so let’s see what happens when we run….
make agentOk, got some errors.
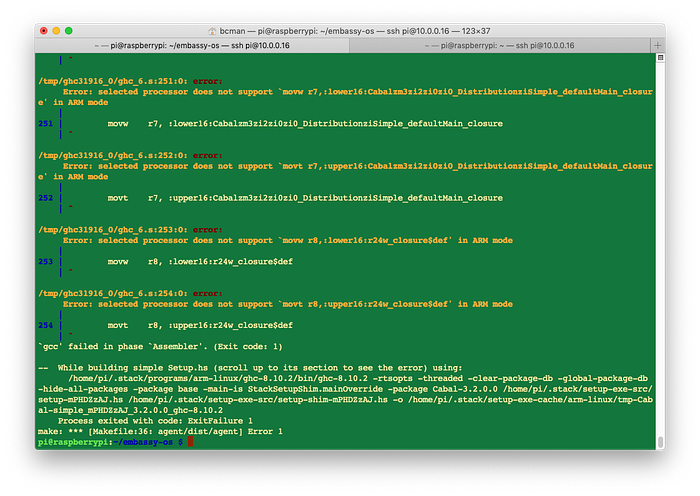
So,
#First confirm your hardware is BCM2711:cat /proc/cpuinfo
#Look for:
#Hardware    : BCM2711
Then if it is:
nano ~/.stack/programs/arm-linux/ghc-8.10.2/lib/ghc-8.10.2/settings#Change line:
#,("C compiler flags", "-marm")
#To:
,("C compiler flags", "-marm -mcpu=cortex-a72")
Ctrl+x, y, enter.
Then we must remove this directory to prevent errors (I believe this is because the failed make agent from before generated this directory and we need a fresh one):
rm -rf ~/.stack/setup-exe-src/Now we run make agent again and it should work this time. This will take a few hours, so I’m off to eat breakfast. Make sure you’re in the right directory, if not: cd ~/embassy-os then make agent.
(Note: “Warning: Failed to decode module interface” that you see at the end doesn’t matter).
Returning 2 hours later. Still not finished. Oh well, time for a quick carnivory shill:

At 208/219. But the last bit will take the longer. I’ll twiddle thumbs for another hour.
Ok done. Lots of ominous warning messages, but we’ll ignore those as instructed.
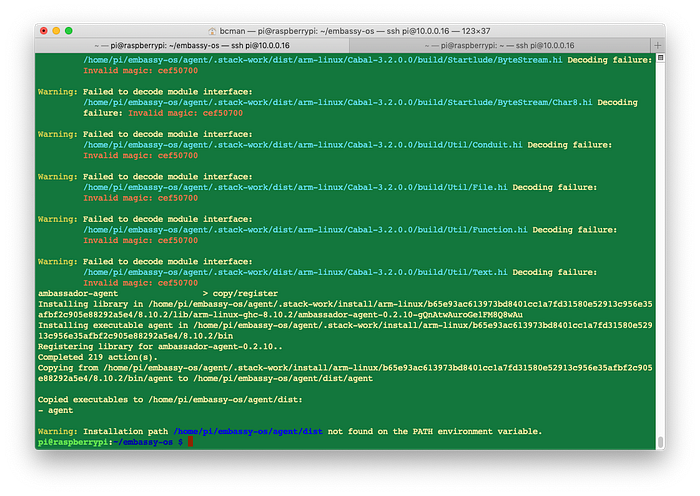
Next step is installing the requirements for building the embassy.
First — nvm:
cd ~
curl -o- https://raw.githubusercontent.com/nvm-sh/nvm/v0.35.3/install.sh | bash
#Now exit SSH and re-enter:
exit
ssh pi@whateveryourIPaddressis
nvm --version
#Mine was 0.35.3 - you may have a more recent version
Next — Node.js & NPM:
nvm install nodeThen Ionic CLI:
npm install -g @ionic/cli That threw up an option to update `npm install -g npm@7.6.2`<-Let’s resort to that if the build fails. Ignore for now. (EDIT: Didn’t end up mattering)
Next, a tonne of dependencies:
sudo apt-get install -y build-essential openssl libssl-dev libc6-dev clang libclang-dev libavahi-client-dev upx ca-certificatesNow, finally Rust:
cd ~
curl --proto '=https' --tlsv1.2 -sSf https://sh.rustup.rs -o- | bash
#Choose option 1
#Then:
source $HOME/.cargo/env#Check Rust + Cargo versions:
rustc --version
cargo --version
#Both returned something logical for me.
All good? OK now to make the image!
cd ~/embassy-os/appmgr
cargo update
#Next one takes a while:
cargo build --release --features=production
/usr/bin/arm-linux-gnueabihf-strip ~/embassy-os/appmgr/target/release/appmgr
cd ~/embassy-os/lifeline
cargo build --release
Now I’m going to build embassy.img using the recent modifications to both the Makefile and make_image.sh found here:
https://github.com/k0gen/embassy-os/blob/master/Makefile
https://github.com/Start9Labs/embassy-os/pull/241/commits/aac424dd040089fc6f464e6379f033b1086fcc94
Modify as below:
cd embassy-ostouch MakefileNew
touch make_imageNew.shnano make_imageNew.sh
#paste in this:#!/bin/bashmv buster.img embassy.img
product_key=$(cat product_key)
loopdev=$(losetup -f -P embassy.img --show)
root_mountpoint="/mnt/start9-${product_key}-root"
boot_mountpoint="/mnt/start9-${product_key}-boot"
mkdir -p "${root_mountpoint}"
mkdir -p "${boot_mountpoint}"
mount "${loopdev}p2" "${root_mountpoint}"
mount "${loopdev}p1" "${boot_mountpoint}"
mkdir -p "${root_mountpoint}/root/agent"
mkdir -p "${root_mountpoint}/etc/docker"
echo -n "" > "${root_mountpoint}/home/pi/.ssh/authorized_keys"
chown -R pi:pi "${root_mountpoint}/home/pi/.ssh"
echo -n "" > "${boot_mountpoint}/ssh"
echo "${product_key}" > "${root_mountpoint}/root/agent/product_key"
echo -n "start9-" > "${root_mountpoint}/etc/hostname"
echo -n "${product_key}" | shasum -t -a 256 | cut -c1-8 >> "${root_mountpoint}/etc/hostname"
cat "${root_mountpoint}/etc/hosts" | grep -v "127.0.1.1" > "${root_mountpoint}/etc/hosts.tmp"
echo -ne "127.0.1.1\tstart9-" >> "${root_mountpoint}/etc/hosts.tmp"
echo -n "${product_key}" | shasum -t -a 256 | cut -c1-8 >> "${root_mountpoint}/etc/hosts.tmp"
mv "${root_mountpoint}/etc/hosts.tmp" "${root_mountpoint}/etc/hosts"
cp agent/dist/agent "${root_mountpoint}/usr/local/bin/agent"
chmod 700 "${root_mountpoint}/usr/local/bin/agent"
cp appmgr/target/release/appmgr "${root_mountpoint}/usr/local/bin/appmgr"
chmod 700 "${root_mountpoint}/usr/local/bin/appmgr"
cp lifeline/target/release/lifeline "${root_mountpoint}/usr/local/bin/lifeline"
chmod 700 "${root_mountpoint}/usr/local/bin/lifeline"
cp docker-daemon.json "${root_mountpoint}/etc/docker/daemon.json"
cp setup.sh "${root_mountpoint}/root/setup.sh"
chmod 700 "${root_mountpoint}/root/setup.sh"
cp setup.service "${root_mountpoint}/etc/systemd/system/setup.service"
ln -s  /etc/systemd/system/setup.service "${root_mountpoint}/etc/systemd/system/multi-user.target.wants/setup.service"
cp lifeline/lifeline.service "${root_mountpoint}/etc/systemd/system/lifeline.service"
cp agent/config/agent.service "${root_mountpoint}/etc/systemd/system/agent.service"
cat "${boot_mountpoint}/config.txt" | grep -v "dtoverlay=" > "${boot_mountpoint}/config.txt.tmp"
echo "dtoverlay=pwm-2chan" >> "${boot_mountpoint}/config.txt.tmp"
mv "${boot_mountpoint}/config.txt.tmp" "${boot_mountpoint}/config.txt"
umount "${root_mountpoint}"
rm -r "${root_mountpoint}"
umount "${boot_mountpoint}"
rm -r "${boot_mountpoint}"
losetup -d ${loopdev}
echo "DONE! Here is your key:"
echo "${product_key}"#Done?
ctrl+x, y, enter
Next:
nano MakefileNew
#paste in this:UNAME := $(shell uname -m)EMBASSY_SRC := buster.img product_key appmgr/target/armv7-unknown-linux-gnueabihf/release/appmgr ui/www agent/dist/agent agent/config/agent.service lifeline/target/armv7-unknown-linux-gnueab
ihf/release/lifeline lifeline/lifeline.service setup.sh setup.service docker-daemon.json
APPMGR_RELEASE_SRC := appmgr/target/armv7-unknown-linux-gnueabihf/release/appmgr
LIFELINE_RELEASE_SRC := lifeline/target/armv7-unknown-linux-gnueabihf/release/lifelineifeq ($(UNAME), armv7l)
        EMBASSY_SRC := buster.img product_key appmgr/target/release/appmgr ui/www agent/dist/agent agent/config/agent.service lifeline/target/release/lifeline lifeline/lifeline.service setup
.sh setup.service docker-daemon.json
        APPMGR_RELEASE_SRC := appmgr/target/release/appmgr
        LIFELINE_RELEASE_SRC := lifeline/target/release/lifeline
endifAPPMGR_SRC := $(shell find appmgr/src) appmgr/Cargo.toml appmgr/Cargo.lock
LIFELINE_SRC := $(shell find lifeline/src) lifeline/Cargo.toml lifeline/Cargo.lock
AGENT_SRC := $(shell find agent/src) $(shell find agent/config) agent/stack.yaml agent/package.yaml agent/build.sh
UI_SRC := $(shell find ui/src) \
                        ui/angular.json \
                        ui/browserslist \
                        ui/client-manifest.yaml \
                        ui/ionic.config.json \
                        ui/postprocess.ts \
                        ui/tsconfig.json \
                        ui/tslint.json \
                        ui/use-mocks.jsonall: embassy.imgembassy.img: $(EMBASSY_SRC)
        chmod +x make_image.sh
        sudo ./make_image.shbuster.img:
        wget -O buster.zip https://downloads.raspberrypi.org/raspios_lite_armhf/images/raspios_lite_armhf-2020-08-24/2020-08-20-raspios-buster-armhf-lite.zip
        unzip buster.zip
        rm buster.zip
        mv 2020-08-20-raspios-buster-armhf-lite.img buster.imgproduct_key:
        echo "X\c" > product_key
        cat /dev/random | base32 | head -c11 | tr '[:upper:]' '[:lower:]' >> product_key$(APPMGR_RELEASE_SRC): $(APPMGR_SRC)
ifeq ($(UNAME), armv7l)
        cd appmgr && cargo update && cargo build --release --features=production
        arm-linux-gnueabihf-strip appmgr/target/release/appmgr
else
        docker run --rm -it -v ~/.cargo/registry:/root/.cargo/registry -v "$(shell pwd)":/home/rust/src start9/rust-arm-cross:latest sh -c "(cd appmgr && cargo build --release --features=production)"
        docker run --rm -it -v ~/.cargo/registry:/root/.cargo/registry -v "$(shell pwd)":/home/rust/src start9/rust-arm-cross:latest arm-linux-gnueabi-strip appmgr/target/armv7-unknown-linux-gnueabihf/release/appmgr
endifappmgr: $(APPMGR_RELEASE_SRC)agent/dist/agent: $(AGENT_SRC)
        (cd agent && ./build.sh)agent: agent/dist/agentui/node_modules: ui/package.json
        npm --prefix ui installui/www: $(UI_SRC) ui/node_modules
        npm --prefix ui run build-produi: ui/www$(LIFELINE_RELEASE_SRC): $(LIFELINE_SRC)
ifeq ($(UNAME), armv7l)
        cd lifeline && cargo build --release
        arm-linux-gnueabihf-strip lifeline/target/release/lifeline
else
        docker run --rm -it -v ~/.cargo/registry:/root/.cargo/registry -v "$(shell pwd)":/home/rust/src start9/rust-arm-cross:latest sh -c "(cd lifeline && cargo build --release)"
        docker run --rm -it -v ~/.cargo/registry:/root/.cargo/registry -v "$(shell pwd)":/home/rust/src start9/rust-arm-cross:latest arm-linux-gnueabi-strip lifeline/target/armv7-unknown-linux-gnueabihf/release/lifeline
endiflifeline: $(LIFELINE_RELEASE_SRC)#done?
ctrl+x, y, enter
OK now let’s keep the old Makefile and make_image.sh safe somewhere.
mv Makefile oldMakefile
mv make_image.sh oldmake_image.sh
And rename the new ones:
mv MakefileNew Makefile
mv make_imageNew.sh make_image.sh
OK now the moment of truth!
make(I’m more hopeful that this works than I am that someone has made it this far into this guide.)
Well…it worked!!
******Make a note of the product key*******
Now let’s copy the embassy.img to our mac!
exitscp pi@IPADDRESS:~/embassy-os/embassy.img .
If the above works, you have your embassy image on your mac. Now to flash it (using the second, 128GB SD card — we want to keep the small SD card we’ve been using untouched for now in case there is a problem and we need to fix it without redoing all our hard work. This is why 2 SD cards are basically essential).
Flash the image onto the large, unused 128GB SD card using Etcher again, following the process described way earlier.
ssh back into the pi and sudo shutdown now, remove the smaller SD card we used to compile everything and set it aside for now.
We’ll take this opportunity to put in the speaker.
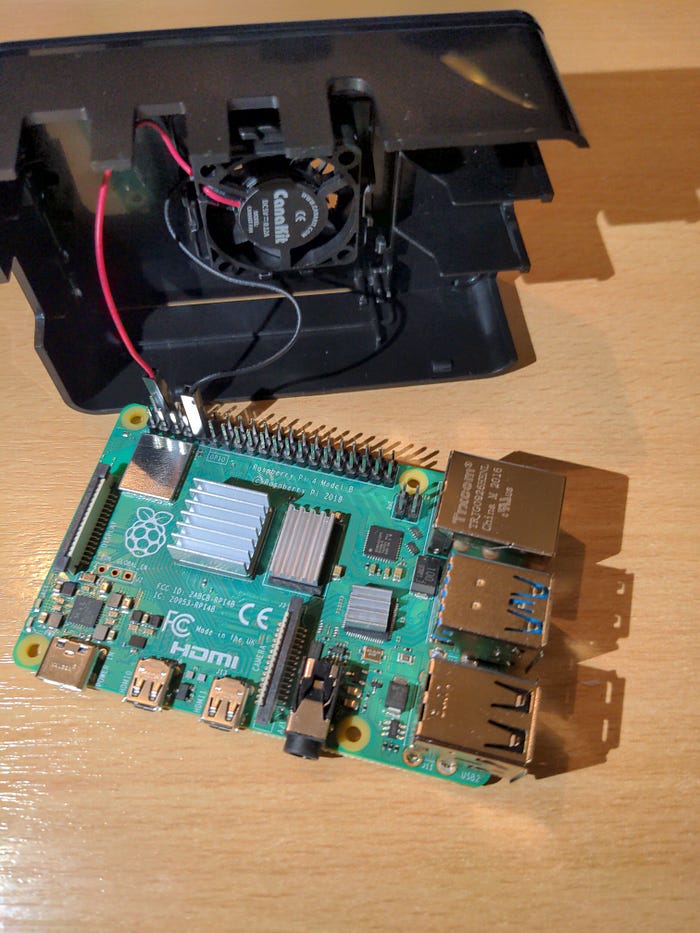
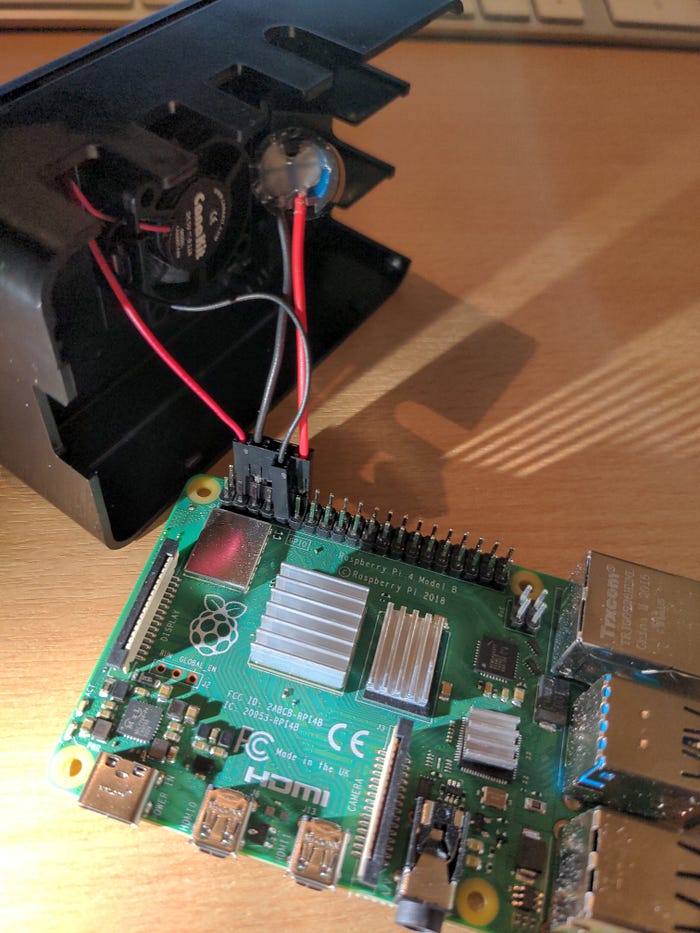
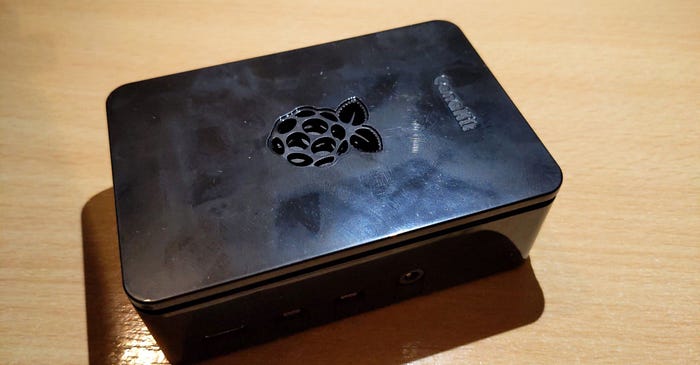
Now we can take out the SD card from the mac, insert it into the pi, plug up everything else and boot it up!
Wait some minutes and the Embassy will start doing its thing. We’ll hear a variety of sounds:
- Short Beep = Raspi finished reboot/startup sequence.
- Mario “Coin” = EmbassyOS has started.
- Mario “Death” = Raspi is about to Shutdown/Reboot.
- Mario “Power Up” = EmbassyOS update sequence.
- Beethoven = Update failed :(
After powering up the Pi the embassy is already going for it, making Mario power up sounds. Already heard Beethoven twice so that’s not a great sign but just heard mario coin sound — that’s good!
So it hasn’t worked yet. It’s caught it a boot loop, with no SSH to shutdown the pi.
Only thing I can do it unplug it I guess.
Plug it in again and see what happens?
Same thing again. Hmmmmm.
OK one more time for good measure?
……..
Wut…..it worked now?
Classic.

Next step is to download the start9 setup app on my android (links found here: https://docs.start9labs.com/user-manual/initial-setup.html#initial-setup), type in the product key and create a password. Use a really good one.
OK I’m in. Take a note of the onion URL you are given.
If you’re an iPhone user, get consulate. If not, lets just use tor browser to access it.
Upon logging in via my girl’s iPhone I get nasty red text at the top:
"/root/agent/ca/index.txt.attr: openBinaryFile: does not exist (No such file or directory)"And marketplace completely barren. Not working yet. OK.
I head on back to matrix chat and ask. I see someone has responded from earlier saying add SSH manually to the SD card. I unplug the embassy, take the SD card out, add ssh.txt to “boot” as done over and over again in this guide, plug the embassy back in. I still can’t ssh in (don’t know the password and wasn’t able to create it due to skipping the whole manual setup.sh part. There will be a way around this which I will add to the guide as it would alweays be useful to be able to SSH into the embassy. **EDIT: Solution at the bottom).** **This didn’t help, or make me able to SSH in yet, pretty sure the improvements just came from another reboot**
Now the embassy loads up perfectly!
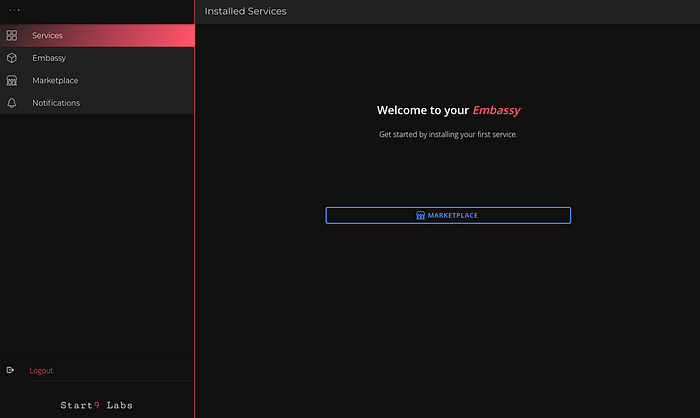
Stunning! I’ll leave it up to her to decide what she wants to install.
Assuming we don’t run into problems there, we are done!
Boom.
Thank you very much to Start9labs for making this awesome product.
Please contact me if you run into issues:
bitcoinmechanicCA@protonmail.com
Thanks you for reading!
edit: to get SSH working:
#on the mac:
cd ~/.ssh
ssh-keygen -t ed25519
#no filename or password (leave blank)
cat ~/.ssh/id_ed25519.pub | pbcopy
#now open up embassy, go to "embassy" then "developer options"
#ssh keys
#paste in the pubkey
#now you should be able to ssh in from the mac with no problem
For WiFi:
#ssh in to your embassy
sudo raspi-config
#locatlization options
#change WLAN country
#find your country
#"OK"
#Finish
#Now go back to the embassy and find "Wifi Setup"
#Enter credentials
#Tor services may be unavailable for a while once Ethernet is #unplugged.


